Please help me welcome Kim. You're going to love her!
**************************************************
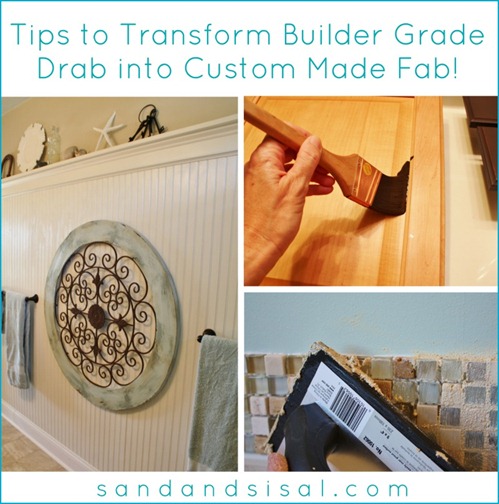
Hi everyone! I’m Kim from Sand and Sisal and I’m happy to be guest hosting for Amanda today! Many of us do not have the luxury of living in a home filled with custom features. We often find ourselves with beige walls and boring sub-par cabinetry and fixtures. Achieving a gorgeous custom made look is easier than you think and won’t break your bank! Today I’m going to give you a few Tips to Transform Builder Grade Drab into Custom Made Fab!
TRANSFORM THE WALLS WITH PAINT
The most basic tip in creating a custom look is of course to add color with paint. Painting a room can transform the entire mood and feel of a space for very little expense. I like to add interest to a painted room by adding stripes and additional colors that complement each other.
If adding additional colors is a bit too bold for you, consider painting a room first in a flat or egg shell sheen and then painting horizontal or vertical stripes in the exact same color, but in a gloss sheen. You’ll have created a subtle and sophisticated effect. Click to read my tutorial Painting Stripes Made Easy like you see in the “before and after” pictures below.
TRANSFORM YOUR HARDWARE AND FIXTURES
The next way to get that custom look is to transform your fixtures and hardware. You do not have to spend money on changing out your hardware for new ones though! You can paint it. I have fallen in love with Rustoleum’s Universal spray paints. They are primer and paint in one, will cover any surface, and come in several metallic finishes.
Look at how I transformed this ugly plastic and ceramic towel bar into a pretty oil rubbed bronze bar. Click HERE to see all the different types of hardware you can spray paint.
TRANSFORM YOUR MIRRORS
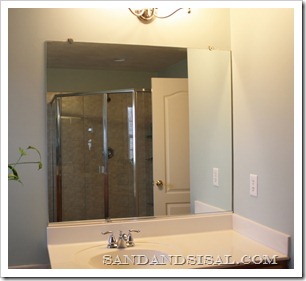
Most of us have these gigantic plain mirrors in our home, lacking any type of originality. Paying a company to add a custom frame to you mirror is expensive! In my tutorial How to Frame a Mirror I teach you how to create a gorgeous, lightweight frame made from PVC moldings for under $30! Once you make your first mirror frame, you will be framing every mirror in your home! It’s that crazy easy!
TRANSFORM YOUR BATHROOM WITH TILE
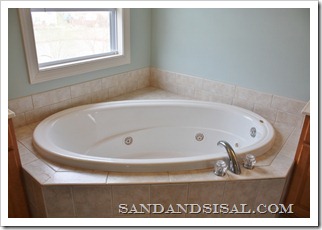
Now I really can’t complain about my master bath. It’s “bones” are gorgeous but it lacked any kind of special personality. I decided to Add Glass and Stone Tile Border right above the top edge of my tub and my shower surround.
If you’ve never tiled anything in your life, I promise you, that you will be able to do this! Just look at the difference the tile makes in the before and after pictures below.
TRANSFORM YOUR KITCHEN
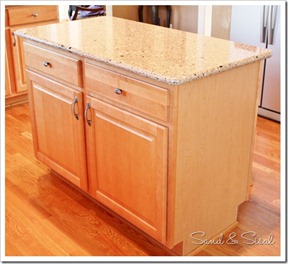
I love my island. I get used more than any part of the kitchen, and it is also the focal point of the kitchen. The problem was that it looked like a plain box. The cabinet fronts are maple but the ends are thin fiberboard with a “maple looking” veneer. I transformed the island by adding bead board and newel posts to the ends and then painting the entire island a new contrasting color.
This project requires the use of power tools but the overall results are amazing. You can save several hundred dollars by doing this project yourself vs. hiring it out. Click here to read how to do a Kitchen Island Makeover.
TRANSFORM YOUR CABINETS
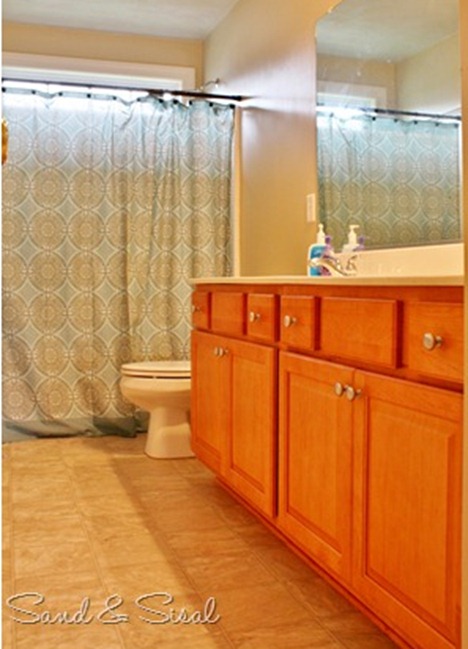
Our maple cabinets are getting an orange hue that seems to intensify with each passing year. I don’t like it. I wanted rich espresso brown cabinets but replacing them seemed ridiculous because they are still in wonderful condition. Thankfully, Rustoleum has make a Cabinet Transformation kit that you custom color to what you like. This kit allows you to paint with out priming even. There are steps you must do to prepare the cabinets for paint but it does not involve sanding! Woo-hoo!!!
In my tutorial Painted Cabinets I walk you through step by step on how to paint, distress, glaze, and protect the cabinets. Your friend will be amazed at the custom high-end look of your painted cabinets when you are done!
TRANSFORM WALLS WITH BEAD BOARD AND TRIM
Adding bead board to a wall gives a room a ton of character. If you are just starting out I recommend trying bead board below a chair rail. For our daughters’ bathroom we added bead board to a wall that reached 3/4 of the way up and installed a picture ledge.
Power tools are a girl’s best friend!
In the post Bead Board Bathroom Reveal you will learn how we installed each part of the bead board wall as well as links to other projects you might see in this bathroom.
I hope you enjoyed these tips on how to transform your builder grade drab to custom made fab!
Kim
*************************************************
Special thanks to Kim for sharing her secrets with us. I have admired her style for awhile now, so I was really pleased when she agreed to share a post here at Serenity Now. Updated cabinet fixtures are on my to-do list for our kitchen. Isn't it amazing what some paint and elbow grease can do?
Here's the button code for the party if you want to get a head start! Recipes, crafts, home decor, book reviews, funny stories, you name it. Come prepared to showcase your blog and find some great weekend reads.







![painted cabinets[2] painted cabinets[2]](http://lh6.ggpht.com/-JFiVCn8thk8/T52cBXpzhUI/AAAAAAAAHRU/pIKDVCd1ifI/painted-cabinets28.jpg?imgmax=800)


A.MA.ZING! These truly are fabulous tips that are so timely for me. I'm moving into a new house next month and look forward to incorporating your ideas to personalize my home.
ReplyDeleteWow! Those were such great and simple transformations. I am getting ready to spray paint a few of our builder grade things around the house as well. I love what a difference a little paint can make.
ReplyDeleteAbsolutely fantastic tips!! I'm going to have to try some of these :)
ReplyDeleteGreat post! You sure are good at that Kim. Loved the bathroom walls. Well, both. The stripe and the wood treatment. Fabulous!! Pinning all this goodness.
ReplyDeleteAmanda- Hope your little bug feels better for the big vaca =)
Wow, she is ah-may-zing! I can't wait to hop over to her blog to get more tutorials. I'm so glad you had her a guest. Great post!
ReplyDeleteThese are really great tips that really make a big impact. We still have a lot of builder grade things in our house to transform!
ReplyDelete-Shelley
Great tips Kim! I love what you did with the tile around your tub. That really added a beautiful custom touch. Have a great time at Disney World Amanda!
ReplyDeleteThese are such great tips! My husband and I have always lived in the "drab" builder-grade homes and I can attest to the difference the bead board and paint alone make. I wish I would have incorporated more of these ideas (like spray painting the towel rods- genius!) into our last house before we sold it. Doing that for sure next time around!
ReplyDeleteWonderful ideas as always from Kim!
ReplyDeleteThat kitchen island looks amazing! I love the stripes in the bathroom too. I have been wanting to paint stripes somewhere, but I haven't been brave enough yet:)
ReplyDeleteWOW!! I love the transformation, great tips thanks for sharing.
ReplyDeleteI love this post! Thanks so much!!! Have fun in Disney!!!
ReplyDeleteThanks so much ladies! I really appreciate all the lovely comments and support! ;)
ReplyDelete~ KIM @ Sand & Sisal
Great post. There are lots of great ways to spice up builder grade products and you really have some great ideas.
ReplyDelete