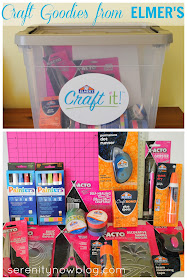
To celebrate a new Facebook Community, Elmer's Craft It!, Elmer's sent me this awesome (and super sturdy!) container filled with crafty goodies from the Elmer's and X-ACTO line. And guess what? One of you gets to win your own Craft It! Pack later this week, so be sure to check back in (Follow or Subscribe!) and enter.
Items I used from the Craft It! Pack were:
-9 x 12 Mini Foam Display Board
-Gripster Craft Knife
-Design Series Metal Ruler
-12 x 12 Self Healing Mat
- 8 inch scissors
-Dot Runner
-Foam Mounting Tape
-Thin Medium Glue Spots
-Quick Dry Dual Tip Glue Pen
Other items used that I had on hand:
-Wrapping Paper
-Burlap
-Fabric Trim
-Hot Glue Gun
-Elmer's Spray Adhesive
Here's how I put it together:
1. Adhere wrapping paper to the back of the foam board. Trim excess with scissors.
I wanted the wrapping paper to stick to the board without any lumps or bubbles, so I chose to spray it down with some Elmer's Spray Adhesive from my craft stash. Smooth as can be!
2. Snip the paper diagonally to each corner and fold up, making a crease.
3. Use the wider side of the Quick Dry Glue to adhere the wrapping paper to the foam board.
Press down firmly.
4. Use your Gripster Craft Knife to cut away any excess wrapping paper from the edges.
The front of your board will be covered with wrapping paper and the back will be bare, except for where the paper wrapped around.
5. Cut a length of burlap and wrapping paper (long enough to partially wrap around your board).
Use the Glue Spots to lay the burlap down on top of the front of the board.
6. Use the Dot Runner to stick the wrapping paper strip on top of the burlap.
Press down firmly to adhere.
7. This is what your board will look like on the back.
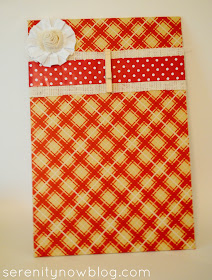
8. This is what the board will look like on the front.
9. Cut a strip of mounting tape to fit the length of a clothespin.
10. Adhere the mounting tape to one side of the clothespin and use the Gripster Craft Knife to trim off excess on the edhes.
11. Use the X-ACTO Metal Ruler to find the center of your board and stick the clothespin down there.
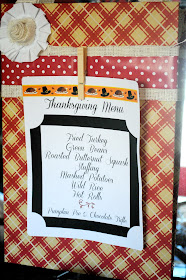
12. You now have a plain display board. Nice, but needed something more....
I wanted to add a little decorative touch, so I hot glued some trim and burlap together to make a little fabric rosette:
I also hot glued a strip of burlap to the back to make a "hanger" for the board.
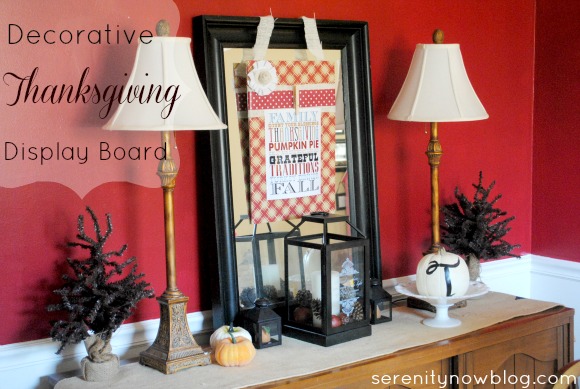
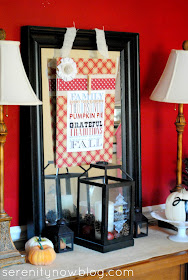
I love that I can use the board to display our Thanksgiving Menu, a "Thankful List," a photo,or fun printables (the one pictured is from eighteen25, but I plan on downloading Erin's Thanksgiving Subway Art from How to Nest for Less this week). The same idea can easily be replicated for other holidays!
Does your family have any special Thanksgiving decorations, displays, or activities?
I hope you liked today's project. I wanted to do something special for Thanksgiving this year. Christmas is my absolute favorite holiday, but I wanted to focus on the importance of this month's tradition of giving thanks for the many blessings in my life. Christmas will be here soon, but Thanksgiving is getting its time in the spotlight this month!
Be sure to visit Elmer's Craft It! Community on Facebook for all sorts of creative DIY project ideas for any season! My favorite products were the Quick Dry Dual Tip Glue Pen and the Gripster Craft Knife. Both items made this project a breeze. Elmer's puts out consistent, quality product...always a pleasure to craft with!
If you enjoyed this post or found it helpful, I hope you'll click your Pin It button to add this post to Pinterest, or a +1 for Google+.
Linked to Positively Splendid
*Disclaimer: I received a craft pack from Elmer's to review, but was not compensated financially for this post. All opinions are, as always my own.



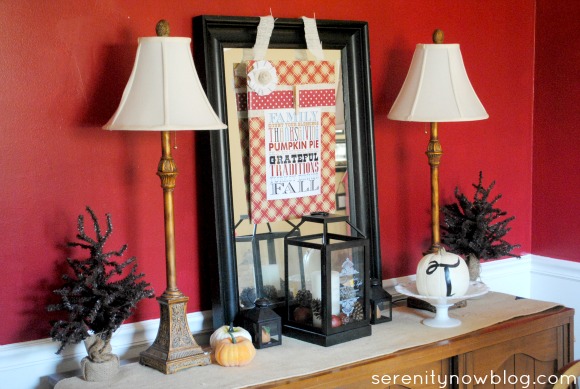

Amanda, your display board looks great! You did a good job combining elements to come up with a pleasing whole. I like the way you can use it for different purposes, too. Your sideboard looks lovely!
ReplyDeleteHow fun to receive a whole box of Elmer's and X-Acto goodies! Such trusted brands--glad to see they're introducing new craft supplies to their lines.
This is so cute! I love that you added the clothespin so you can change out your display! I bet one of your girlies will bring home a cute turkey that you can clip up too:)
ReplyDeleteWhat a clever idea!
ReplyDeleteI love this display board. Next year you can use it from September through Thanksgiving. Wouldn't the girls love it if you used it to spotlight a good paper from school or some of their artwork?
ReplyDeleteI love Thanksgiving decor and will display it through the big day.
Super cute Amanda! Nice job. =)
ReplyDelete~ Catie
This turned out lovely!
ReplyDelete