1. Jewelry Enamel(s) in your choice of colors
2. Charms
3. Jewelry Pliers
4. Silicone Work Mat
5. Jewelry Glue
6. Silicone Brush
7. Activator
8. Jump Rings
9. Clear Enamel (optional)
10. Blank Setting Pendant
11. Detail Scissors (better for cutting out small things)
12. Wallet Sized Photo
13. Chain
13. Chain
14.. Not Pictured: Lobster Clasp, Closure of your choice, Pen, Toothpicks, Something to trace the photo with
Directions:
*Be very careful to follow the instructions on the packages. The enamels and glue do have wait times, and you'll need to factor that into your planning.*
1. Start with jewelry glue, blank pendant, photo of choice (you can make wallet sized photos at any Kodak kiosk), detail scissors, pen, and something to trace with.
2. Trace your photo to fit the pendant. I used the lid of a soy sauce bottle to trace over my photo because it just fit inside the recessed area of my pendant. Cut out the photo.
3. Use a bit of jewelry glue (it's photo safe!) to adhere your photo to the pendant. Be sure to read the instructions! I found I had to spread it a bit because it is very thick.
4. Follow drying instructions and let the pendant sit.
5. Get out your charms, enamel, activator, silicon brush, silicone mat, and toothpicks.
6. Mix your enamels and activators according to the package. I let mine sit for 2 hours to thicken.
7. Using a toothpick, apply the color to the desired areas. A little goes a long way! I didn't realize it would spread quite as much as it did, so the yellow and white ran together a bit on the seashells, but I ended up liking the effect.
8. As you can see in the photo, I left the charms on their cardboard packaging as I painted since they were secured. I figured there was less of a chance of a small child knocking one or two to the floor. Be sure to follow directions for drying time!
On to the protective enamel finish. This is optional, but it really "finishes" and protects the photo, in my opinion:
And to finish your necklace?
9. Use your jewelry pliers to open and close the jump rings.
10. Attach a lobster closure and jump ring to either side of the end of the chain, creating a way for the necklace to close.
11. Attach your charms and pendant to the chain with jump rings as desired.
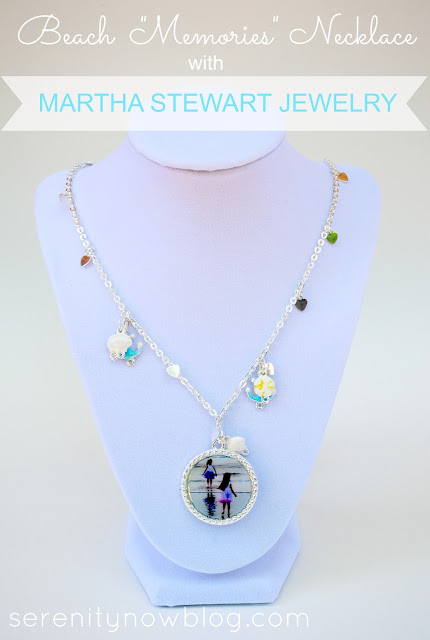
I was so pleased with the way this turned out for my first try at jewelry. I love using photos wherever I can to capture memories, so pairing a picture of my girls from Myrtle Beach with some of Martha's nautical charms seemed like the perfect summer accessory.
I enjoyed working with the Martha Stewart Jewelry line from Plaid because it was so much more than just plugging in pre-made "puzzle pieces" of jewelry. You can really and truly create and customize to your heart's desire. As always, these Martha Stewart products are of exceptional quality, and you can tell that a lot of thought went into the design and color schemes...on trend!
I'm proud to wear this fun, nautical style necklace as a reminder of a wonderful beach vacation with my family. The neat thing about the Martha line is that she has so many other themes to choose from: flowers, woodland, etc.
What kind of photo would you use in your own custom pendant?
If you enjoyed this post or found it helpful, I hope you'll click your "Pin It" button to add this post to Pinterest, or a +1 for Google+. And I always appreciate kind comments!
Connect with Martha Stewart Crafts on Twitter, Facebook, and Pinterest!
Linked to Two Twenty One
Disclosure: This was a compensated post written by me for Plaid Crafts. As always, opinions are all my own.


I'm impressed it's your first piece of jewelry. It's adorable! That picture of your girls is so sweet.
ReplyDeleteA beautiful necklace with a beautiful memory! Its hard to believe this is your first piece of jewelry. You did an awesome job!
ReplyDeletethat turned out fantastic I kept staring at those sea themed charms wanting to use them in my post but couldn't figure it out I love how you used them. I'll have to make sure to take a beach pic of my nieces this summer to make myself a necklace
ReplyDeleteThis turned out so well! Love it!
ReplyDeleteyour a natural Amanda!! I know this will be the first of many! Love it dear!
ReplyDeleteWhat a neat craft! You did a wonderful job.
ReplyDeleteYour necklace turned out so well and I know you'll receive many compliments when you wear it. Isn't it fun to try new craft products?
ReplyDeleteWhat a beautiful and meaningful jewelry diy project!
ReplyDeleteThat is absolutely lovely, a keepsake for sure!
ReplyDeletexo
Kate
This is lovely! What a gorgeous way to preserve those memories!
ReplyDeleteI'm astounded is it your first bit of Jewellery you designed?. It's lovable to see! The chain looks so cool.
ReplyDeleteI love this Amanda!
ReplyDeleteVery beautiful! Visiting from the All Things Summer link up! Feel free to also link this one up at our Ladies Only Blog Share Link Party. Our theme this week is Red, White & BBQ! This fits nicely. :)
ReplyDeletehttp://mommifried.com/ladies-only-blog-share-link-party-red-white-bbq/
I love photos so wearing a special one around my neck would be so cool!
ReplyDelete