Friday, November 29, 2013

Weekend Bloggy Reading :: Link Up!

Happy Friday! Welcome to my Weekend Bloggy Reading link party. This is the day of the week where other bloggers stop by to link up their best post of the week, and readers get to browse tons of fun project ideas. If you're new here, don't forget to "Follow" or subscribe so you don't miss future parties and projects!

*Please be sure to read my guidelines before you add a link--I've had to bypass so many great projects lately because they didn't include a link back to my blog in the post!

This party is a great place to showcase your very best post of the week (home decor, crafts, party ideas, recipes, DIY, tips and tricks, etc.) and to see what else is out there. I'm currently on "maternity leave" to prepare for our third baby (coming Monday, we hope!), so this party is all about you guys! I will be doing my best to keep up with weekly features until I am "back in the game."

Time to link up your best post of the week!

Thursday, November 28, 2013

Happy Thanksgiving!

I have so many blessings to be thankful for today. I pray that you enjoy this holiday with your family and friends. If I can stay awake, I'll be watching the parade and hopefully spending time with my family and resting before the new baby arrives on Monday!


"Give thanks to the LORD, for he is good; his love endures forever."
-I Chronicles 16:34

Wednesday, November 27, 2013

DIY Filled Glass Ball Ornament Craft

Jessi from Practically Functional is filling in for me today and she has some adorable Filled Glass Ball Ornaments to show off. These would make great gifts for teachers, friends, neighbors, or family members!

****************************
Hey there, Serenity Now readers! I'm super excited to be sharing a quick and easy DIY Christmas ornament idea with you guys today! I really love making my own Christmas ornaments, and they also make the perfect handmade gift to give to friends and relatives!
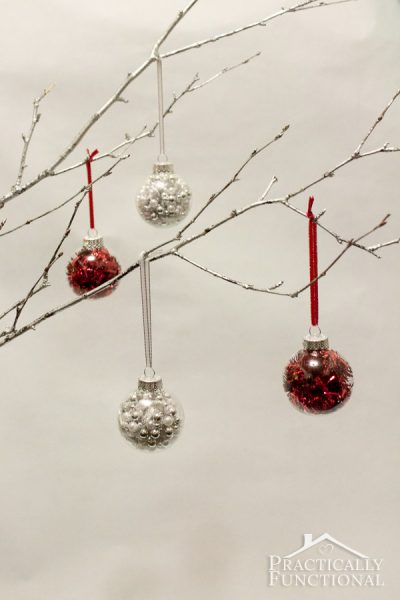
                                     DIY Glass Ball Christmas Ornaments

But first, let me introduce myself! I'm Jessi, and I blog at Practically Functional, a blog about simple, practical projects and ideas to help you love your home, no matter where you live.
Jessi at Practically Functional

We live in a tiny apartment and don’t own a car, but that doesn't stop me! I decorate, I craft, I DIY, I build, I organize, I cook… I even garden! We love every single square foot of our little home, and Practically Functional can help you love yours too, no matter where you live! And don’t worry, I’ll give you detailed instructions and pictures in every tutorial, so stop by for a visit and see if you can find some inspiration! Now on to the Christmas ornaments!

DIY Filled Glass Ball Christmas Ornaments

You only need a few things to make your own Christmas ornaments:
  • empty glass ball ornaments
  • something to fill them with
  • ribbon for hanging
  • scissors
                                            DIY Glass Ball Christmas Ornaments - Supplies


I found all of my supplies at Michaels, but I'm sure any craft store near you will have this stuff! I used a garland of tinsel and a twisted bead and ribbon garland for these ornaments, but you can fill them with anything you can think of that will fit through the opening! Start by pulling out the top of an empty ornament.
                   DIY Glass Ball Christmas Ornaments - Pull out the top and fill with something pretty!


Then cut apart your tinsel garland into a few small pieces and push them into the small opening until the entire ball is filled.
DIY Glass Ball Christmas Ornaments - Filled with tinsel


Next,  pinch the top together and put it back in place. Cut a strand of ribbon, thread it through the top, and tie it so there are about 3-4 inches of loop for hanging the ornament.
DIY Glass Ball Christmas Ornaments - Red tinsel

Or if you want to try something different, just put one single strand in and let it curl around!
DIY Glass Ball Christmas Ornaments - Single tinsel strand


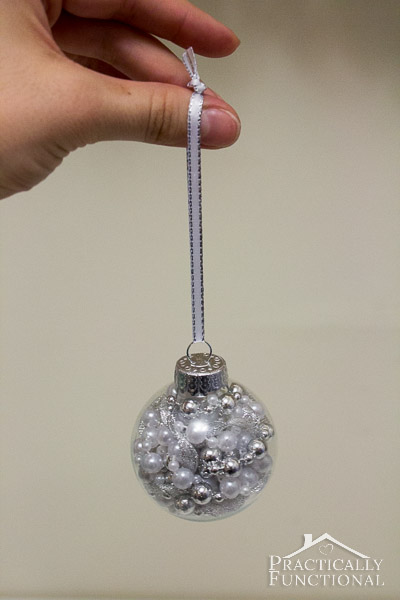
Or try filling the ornament with beads and ribbon instead!
DIY Glass Ball Christmas Ornaments - White pearls and silver ribbon

Get creative with these; you can fill them with anything that will fit in through the opening! You can use beads, sand, ribbon, curled paper strips, tinsel, and more! Thanks a ton to Amanda for letting me share this with you guys today! If you liked the craft project, make sure you stop by Practically Functional for a visit! I'd love to see you there!
                                                             Signature
twitterfacebookpinterestinstagram

*********************************

Thanks for sharing with us, Jessi! I know my girls would love to help make some of these as gifts this year!

If you enjoyed this post or found it helpful, I hope you'll click your "Pin It" button to add this post to Pinterest, or a +1 for Google+. And I always appreciate kind comments.

Follow on Bloglovin

Tuesday, November 26, 2013

DIY Chandelier Makeover for Baby Girl Nursery

I've got all things nursery on the brain lately, so the very clever Kelly from View Along the Way agreed to stop by Serenity Now to share a DIY project with us today. Keep reading to see how she gave an inexpensive chandelier a fab makeover for her baby girl's nursery!
                                       

***************************

Hi, friends! I'm so happy to be here today while Amanda is off cuddling that beautiful baby boy. I wish she could bottle up his delicious newborn scent and have it gently wafting from the computer while we read this post. Wouldn't that be amazing? But then we'd probably all want to go have babies, and that can get dangerous.

These are my no-longer-newborns. (And the husband!) I’m Kelly, and I blog about how we’re fixing up our crusty ol’ foreclosure on the teensiest budget over at View Along the Way.


This is my baby girl's room, which we made over for about $500 - including all the furniture.


Are you wondering why I took that artsy, weird photo from a low angle that doesn't show the ceiling? Okay, you caught me. It's because we had this situation going on.


That is some completely offensive ceiling fan action. Now, I live in the south, y'all. I "get" the need for ceiling fans. But this one was an obnoxiously dark eyesore and we never used it anyway. Time for an upgrade!

I took this little chandelier which I picked up at the Ballard's Outlet for $20-something...


And turned it into this:

...for only $2 plus the cost of a can of spray paint.

First, I strung that bad boy up to a tree outside to take a "before" pic and spray paint it... at which point I became the victim of a serial photobomber.

My husband is 30, guys. Thirty years old. Is thirty-one the magic age when husbands finally grow up? When the photobombing insanity ended, I pulled out a can of spray paint and got this:


I liked how it looked with the new color, but I wanted it to be a little more blingy for my high-stylin' baby girl.

Don't you wish you could rock the topless-with-tutu-look like she does? I don't know: maybe you can. Maybe you can.

One Saturday when we were yard saling, I found these bead things:
 

I think it's supposed to be a beaded curtain of some kind? Not sure. But I thought I could rework some of the turquoise beads for the chandelier, and it was only $2 for the whole bag. I took the existing chain off the chandelier:


And tied the beads on to the existing hooks.


Then I decided I wanted some beads on the bottom too. So I unscrewed the ball thing on the bottom. I cut four strands of beads, removing one from the center, and laid the center opening over the part of the chandelier where the ball screwed in, and reattached the ball back over the string.


I just hot-glued the other end of the beads to the chandelier. And I was all done!

...Except for installation. I hired my photobomber to remove the old fan and install the new chandelier.

And ta-da!


I totally dig the way the light shines through those iridescent beads.

Baby girl is a fan too. She gives it two chubby sweet baby thumbs up!

************************ 

Thanks, Kelly. I'm a fan too! Such a bright, colorful room...just lovely!

If you enjoyed this post or found it helpful, I hope you'll click your "Pin It" button to add this post to Pinterest, or a +1 for Google+. And I always appreciate kind comments.


Follow on Bloglovin

Monday, November 25, 2013

Painted Fall Napkin Rings

Amy from A Nest for All Seasons is here today to show us how she took some plain thrift store napkins rings and turned them into something adorable. I think these painted Fall napkin rings would be too much fun at a kid or tween table for Thanksgiving dinner! Kids are so tech savvy these days, no? Keep reading to see how Amy created them....


************************

Hello hello, all!  I am Amy Renea and I blog about food, photography, DIY design and modern garden living at A Nest for All Seasons.  I am excited to be here today to share a simple little fall craft with you!  All you need is some glass paint and a trip to the thrift store for some napkin rings.  Ready to get your fall table set?

Do you ever get frustrated at the thrift store because everything you want has been marked up?

You know, the thrift store folks figure out that everybody wants candlesticks to make DIY cake stands, so they start marking candle stands $2.99 instead of the normal 25 cents? Yeah, that frustrates me too. What is great about this problem is that it encourages you to think creatively! I always challenge myself to pick out the ugliest item that I see EVERYWHERE for really cheap and reinvent it. Case in point?

These napkin rings:

Ugly yes?   
Cheap?  You bet ya!
They were packaged in this old, cruddy plastic container, 
but boasted a cute "Town and Country" logo, so in the cart they went.

Once they were popped out of the 50 year old packaging, they were instantly better.

Then I decided to add a little humor...

Since these are vintage napkin rings in a melamine finish, they were a blend of old and new.  I decided to keep with the theme and add a "new" story with emoticons.  Using colon, slashes and other punctuation mark stencils from the new Martha Stewart glass paint line, I gave each ring its own "face".   Guests can chose their seat based on their mood or I can give a grumpy kid a hint by placing the grumpy ring at his dinner plate.
Fun, huh?
Want more ideas for using glass paint?
Need a few early ideas for gifts this Christmas? Why not make your own vanilla? ...or be brave and try your hand at this beginner level zig-zag cut quilting technique? ...or microwave hand crafted soap?

******************

Thank you, Amy! I love upcycled projects!

If you enjoyed this post or found it helpful, I hope you'll click your "Pin It" button to add this post to Pinterest, or a +1 for Google+. And I always appreciate kind comments.


Follow on Bloglovin

Friday, November 22, 2013

Weekend Bloggy Reading :: Link Up!

Happy Friday! Today was supposed to be my c-section date, but they're making me wait until December 2nd now. I'm trying to find the silver lining and have decided to see Catching Fire tonight instead. {wink} Because I'm scheduling this ahead of time, I'm going to do something a little different today and show off a couple of Serenity Now holiday projects since I didn't have a chance to do normal features. If you have a chance to visit, comment and/or Pin, I would sure appreciate it!

Welcome to my Weekend Bloggy Reading link party. This is the day of the week where other bloggers stop by to link up their best post of the week, and readers get to browse tons of fun project ideas. If you're new here, don't forget to "Follow" or subscribe so you don't miss future parties and projects!

Please be sure to read my guidelines before you add a link--I've had to bypass so many great projects lately because they didn't include a link back to my blog in the post!

This party is a great place to showcase your very best post of the week (home decor, crafts, party ideas, recipes, DIY, tips and tricks, etc.) and to see what else is out there.

Here are a just a few of my fave holiday recipes and projects:


And...It's also a BOTB weekend at Centsational Girl! Be sure to head over to see what Kate and I rounded up this week for the Best of the Blogosphere. There's always something fabulous to be inspired by! Her post will be up some time today.


Time to link up your best post of the week!

Thursday, November 21, 2013

DIY Stenciled Drop Cloth Table Runner

I fell in love with today's craft tutorial when I first saw it. Brittany from Pretty Hand Girl is going to show us how to make a beautiful stenciled table runner. This project could easily be tailored to any holiday or event. Please help me welcome Brittany to the blog today!
*******************************

DIY Stenciled Drop Cloth Table Runner
{Guest Post by Pretty Handy Girl}

Hi y'all! I'm Brittany, aka Pretty Handy Girl. Normally I'm serving up DIY tutorials on my blog, PrettyHandyGirl.com, but today I'm honored to be guest posting for Amanda. With the holidays fast approaching, you might be looking for some great DIY gift ideas for those tough to shop for people on your gift list.

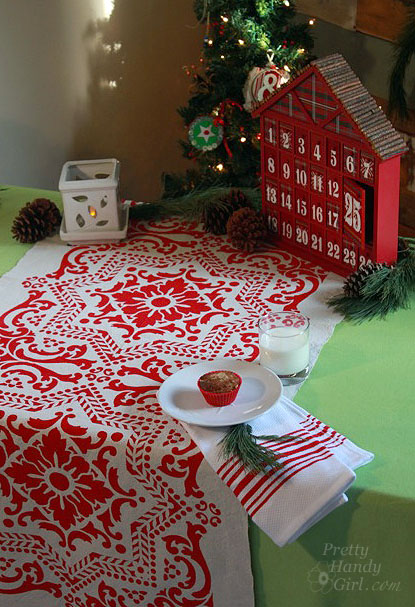
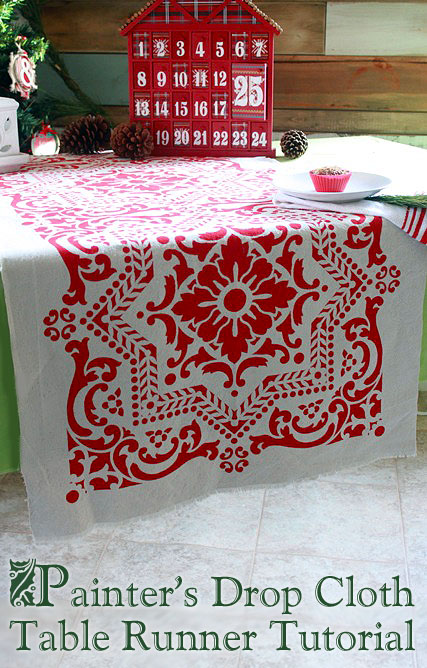
These stenciled table runners are just the ticket for anybody who likes to host parties or just make their table look festive. I'll show you how to make this super easy table runner using a painter's drop cloth and sample paints. And you'll have plenty of leftover cloth to make three more!
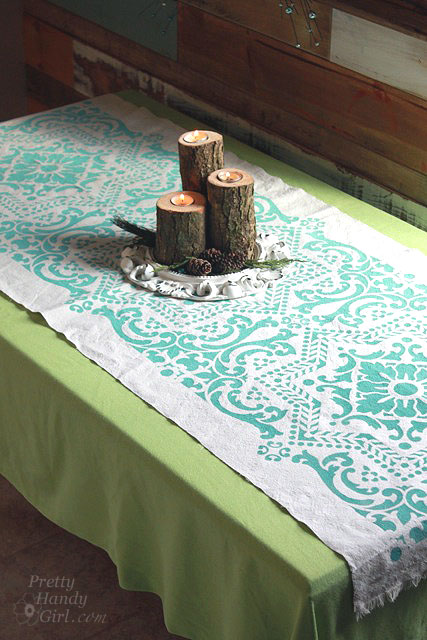
                           DIY Stenciled Drop Cloth Table Runner


You can purchase almost all of the supplies at your local home improvement store (I got my supplies at Lowe's.) The cloth is cut from a canvas drop cloth that was folded into fourths. To make them look and feel more like french grain sack material, the drop cloths are washed 2-3 times in the washer with bleach added to the cycle. The result is a lighter and softer canvas that mimics linen.
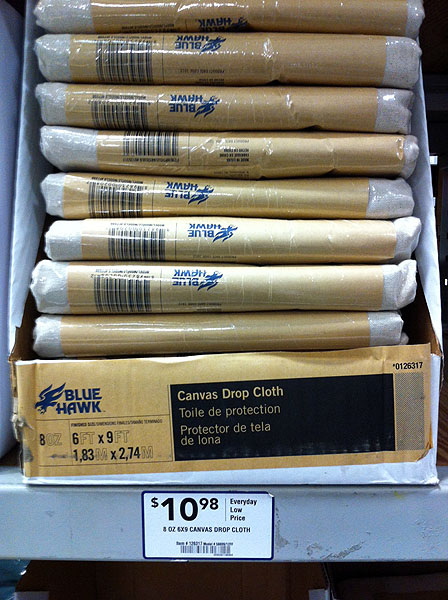
                       painters drop cloth


 I used some leftover latex paint for two of my runners. Plus, I bought a sample of Valspar paint in "Bright Red" for the red one.
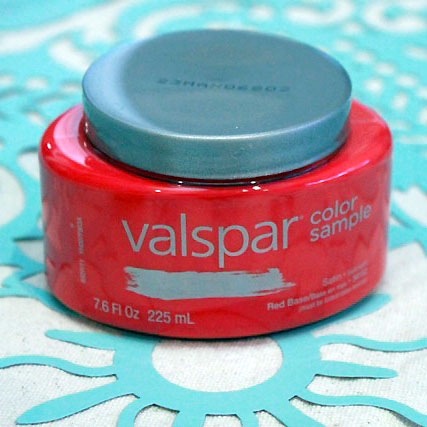
                           

Each sample jar holds enough paint to print two runners.

   
Materials: DIY Stenciled Drop Cloth Table Runner
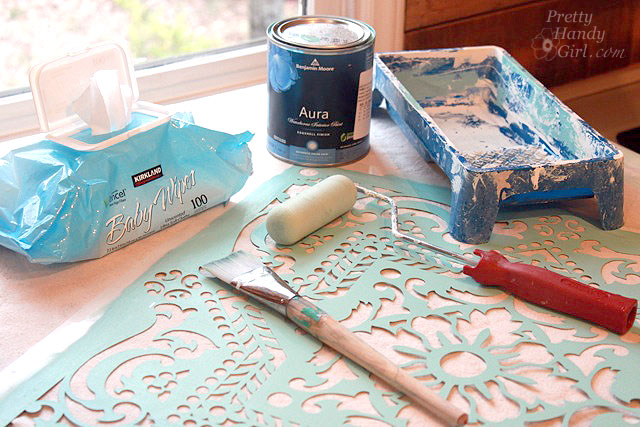
  • 9-ft x 6-ft 8 oz. Canvas Drop Cloth - pre-washed and cut into four 27" x 6' strips
  • 8 oz Paint Sample
  • 4-in Cabinet/Door Foam Roller
  • Paint tray
  • Royal Studio Design Stencil - Lisboa (You don't have to use a stencil, use what you have. Or tape off stripes with painter's tape!)
  • Painter's Tape
  • Wet wipes
Instructions:

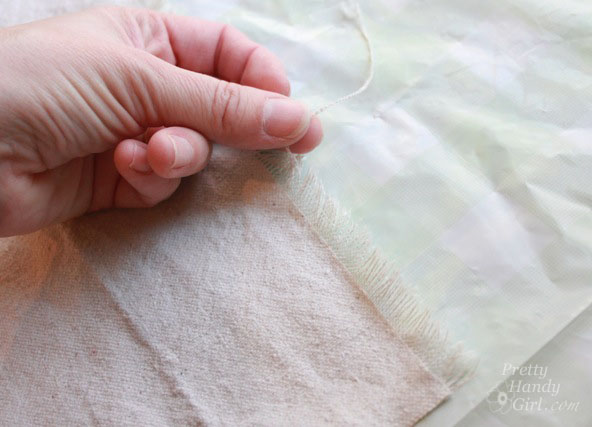
Cut your drop cloth into four lengths measuring 27" x 6' long. Fray the edges of the canvas runners. Trim any long threads.

Fold the canvas runner in half length-wise and iron the fold. Open up the runner, fold it in half width-wise and iron the fold. This will give you a center mark to line your stencil up with. DIY Stenciled Drop Cloth Table Runner
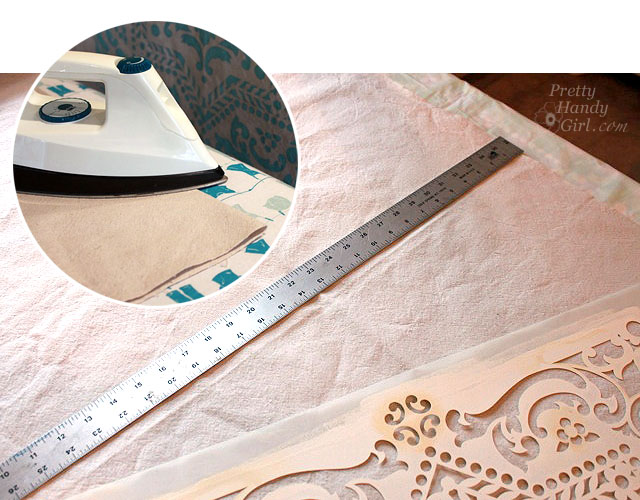

Line up the stencil on the center creases. Put a piece of painter's tape on each corner to hold the stencil in place. DIY Stenciled Drop Cloth Table Runner
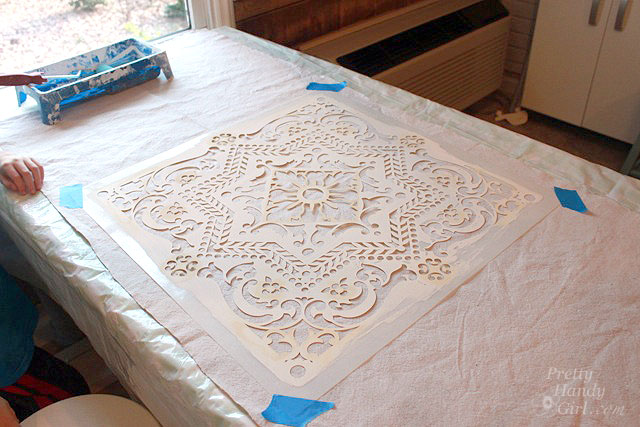

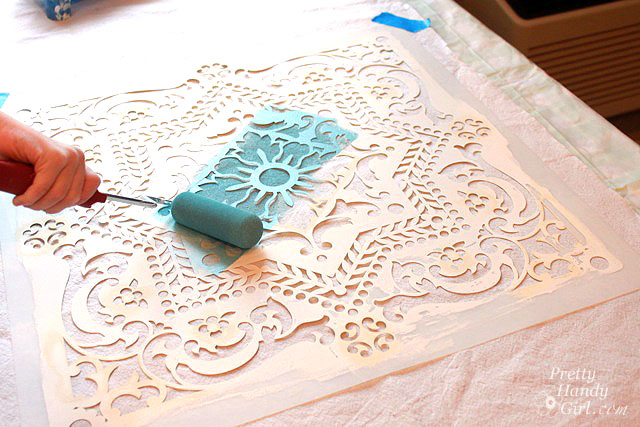
Roll the foam roller into the paint and roll off any excess. Paint over the entire stencil being sure to get equal coverage and not to run over the edge of the stencil.

Carefully lift the stencil up and off the runner. DIY Stenciled Drop Cloth Table Runner
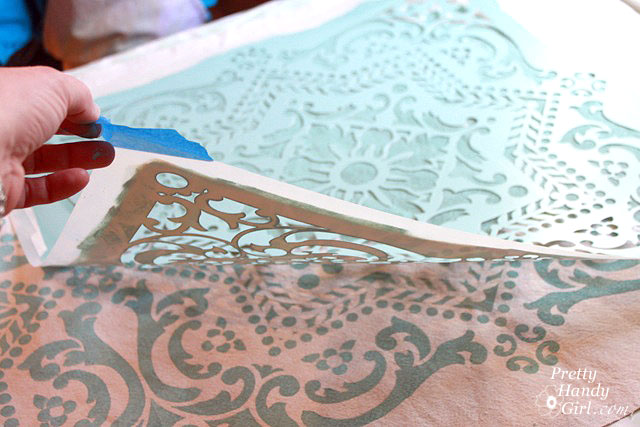

Line the stencil up next to the first print. Make sure the stencil overlaps correctly. DIY Stenciled Drop Cloth Table Runner


Roll paint over the entire stencil again. DIY Stenciled Drop Cloth Table Runner
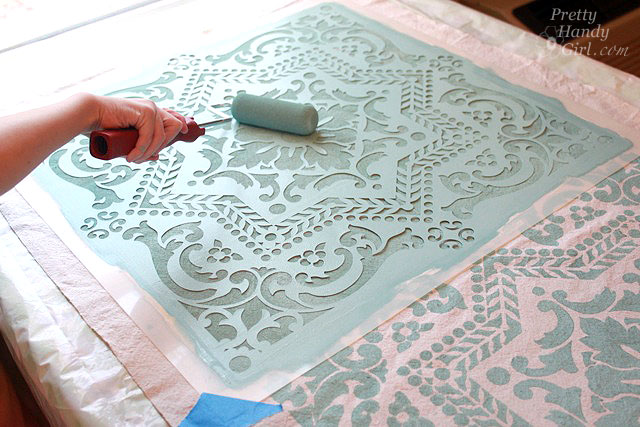

Repeat on the other side of the first stencil print. Three Lisboa stencil prints should fit perfectly on the runner. DIY Stenciled Drop Cloth Table Runner
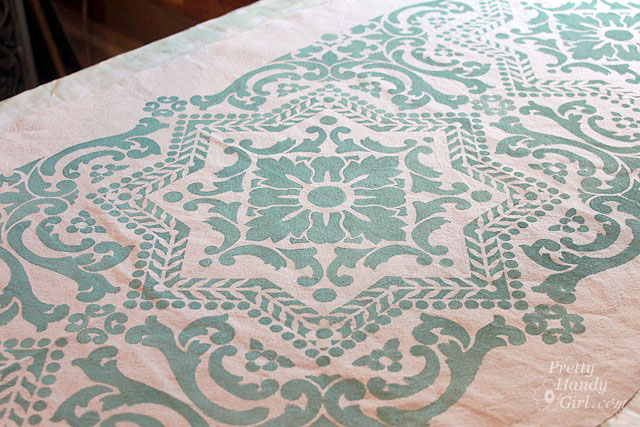

After the paint has dried, you may wash the runner again to soften the paint. The edges will fray a little more, but I tend to like that look. If you don't want the runner to fray you could turn the edges under and sew a seam. DIY Stenciled Drop Cloth Table Runner
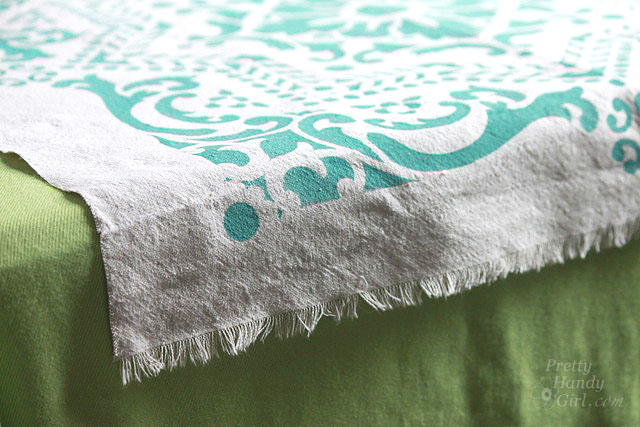

The blue runner would fit in nicely with New Year's Eve or Easter decorations. DIY Stenciled Drop Cloth Table Runner
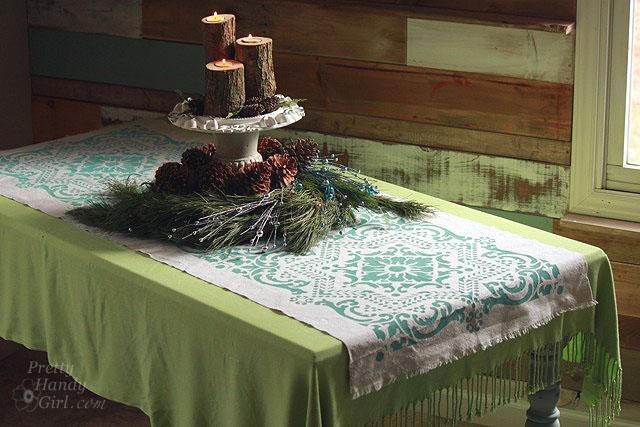

I'm in love with these runners. They are so pretty that I want to keep them for myself. Which color do you like best? Blue...or red?
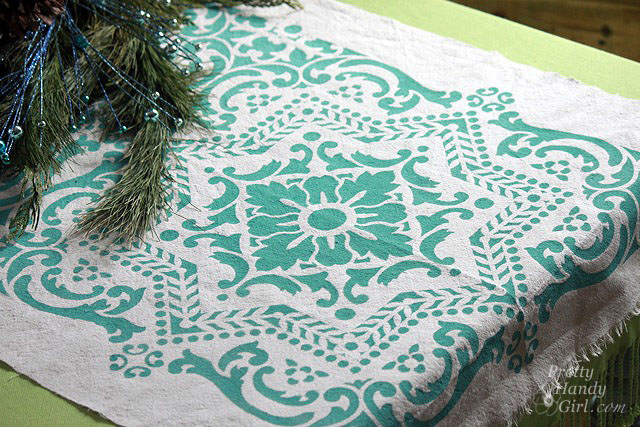
DIY Stenciled Drop Cloth Table Runner
                             DIY Stenciled Drop Cloth Table Runner  


Did you like this tutorial? If you want more DIY gift ideas that won't break your budget, you'll want to check out my Très Frugal series, running all November.
                    Tres-frugal-party

 I'm joined by a few blogger friends to bring you 30 days of DIY gift tutorials!

  PHGFancySign
***************

Thank you, Brittany! I can't wait to try this one out on my own.

What's your favorite way to dress up your table for the holidays?

If you enjoyed this post or found it helpful, I hope you'll click your "Pin It" button to add this post to Pinterest, or a +1 for Google+. And I always appreciate kind comments.


Follow on Bloglovin